Purpose of this repository is to demostrate how to deploy a simple application using Kubernetes as first step and then deploy a Kubernetes application using Helm.
We will use minikube tool to deploy our application.
First of all we need an application to deploy, so for this reason we've created a simple Go application, tha is using Giphy API to print a random gif in our browser.
You would need your own Giphy API key to use the application properly.
To build the image execute:
$ docker build friendsofgo/giphyneitor .
Then you could run it with:
$ docker run -p 8080:8080 -e GIPHY_API_KEY=your_api_key friendsofgo/giphyneitor
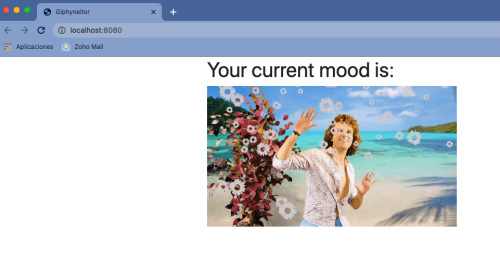
Finally you can navigate to http://localhost:8080 and see something similar to:
The image is hosted on Docker Hub: https://hub.docker.com/r/friendsofgo/giphyneitor
For starters you will need a Kubernetes cluster, we recommend to use minikube to execute it locally, but you could use any other valid tool or even a cloud cluster.
To run our application we will need configuration files inside deploy/k8s; we have a file for each Kubernetes resource, here you have them listed and explained:
As we saw in the Docker image section, we will need an environment variable to use our application, hence we will create a configmap to keep our configuration part isolated from the application code.
The configmap is in deploy/k8s/configmap.yaml and you can install it on your cluster using the following command:
$ kubectl apply -f deploy/k8s/configmap.yaml
As you know Kubernetes Pods have a lifecycle and are mortal. For this reason you could use the deployment to ensure that when a pod dies, then another will be created, but each pod has its own IP address so in some cases (e.g.: a frontend that needs a backend) will need a way to find this IP each time.
In this kind of situations services come to our rescue; a service is an abstraction that defines a logical set of Pods and a policy by which to access them.
Our service file is in deploy/k8s/service and you can install it on your cluster using:
$ kubectl apply -f deploy/k8s/service.yaml
Until now, we've seen how to create our configuration, how to create our service to communicate with our pods seamlessly, but now we need a way to make all these resources work together, and this way is the deployment.
A deployment is the place where you describe the desired state of your Kubernetes application, and the deployment controller changes the current state to the desired state at a controlled rate.
You can find our deployment on deploy/k8s/deployment.yaml and install it on your cluster using:
$ kubectl apply -f deploy/k8s/deployment.yaml
Now we can execute kubectl get to check that all our resources have been created properly.
$ kubectl get pods

NAME                           READY   STATUS    RESTARTS   AGE
giphyneitor-6cd9bd877d-ns6ps   1/1     Running   0          13h
$ kubectl get deployments

NAME          READY   UP-TO-DATE   AVAILABLE   AGE
giphyneitor   1/1     1            1           13h
$ kubectl get services

NAME          TYPE        CLUSTER-IP       EXTERNAL-IP   PORT(S)    AGE
giphyneitor   ClusterIP   10.101.111.215   <none>        8080/TCP   13h
If you want to map your pod with your local server, in order to check if the application is running properly,
you can use the command kubectl port-forward {pod_name} {ports}.
$ kubectl port-forward giphyneitor-6cd9bd877d-ns6ps 8080:8080

Frwarding from 127.0.0.1:8080 -> 8080
Forwarding from [::1]:8080 -> 8080
And that's it!
Now start your favorite browser, go to http://localhost:8080 and enjoy your random gif there!
Coming soon!
